
Back Story:
So, I recently had won a bet with SWMBO (She Who Must Be Obeyed), and my prize purse was $60 in my own slush fund.Now on to the build:
So this is just a port and consolidation of my build thread on HomeBrewTalk.com, my original post can be found here: http://www.homebrewtalk.com/f51/cheap-fermentation-chamber-335729/, but this has been cleaned up to show just the final build and no comments in between posts.
I have looked at the "son of a fermentation chamber" as well as some other options and I wasn't exactly pleased with them, so hence me making my own.
My overall goal with this project is to find a solution that works, given some restraints:
- It has to be under $80 total, ($20 is from what I had left before the bet).
- It has to fit in a corner of my bar room, as I live in a row house, and that is my only sanctuary.
- I'd like it to hold 2 6.5 gallon carboys.
- I would prefer to use a mini fridge or it's guts because our freezer is kind of full and can't handle liter bottles in it.
- I would preferably like to have it raised off the ground a little bit as to make it easier for racking purposes.
- I would like to have a view window, so that I can look at it, if not a door will suffice so that I can peek in.
This is a rough diagram of what I envision the final product to look like, however as we all know once you start building things don't always work out the way you initially plan them.

So I ended up finding and re-purposing a wire frame that we had leftover and lying around the house, I ended up taking out the middle shelves, and then I put a 6.5 gallon and 5 gallon carboy inside to make sure they fit. Which they do. It also fits two 6.5 gallon carboys at the same time.

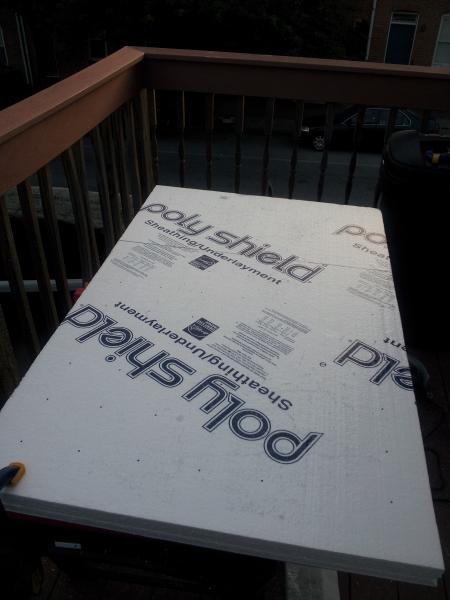
So here is the cut-out plan for the EPS foam sheet that I ended up getting:

It was hot out today, so I waited till the afternoon to do the cutting outside. I just got a large T for 13$ at Home depot, but that won't count against my budget because I expensed it against a small cubby SWMBO wanted me to build.
So cutting the Foam, made me feel like I was trapped inside of a snow globe. I'm pretty sure its in my lungs, but I used a circular saw (60 tooth finishing blade) to cut the EPS, and the cuts came out nice and clean, in the store we used a utility knife. But the saw was way better

With the stand I had, I used a 1/2 inch drill bit to cut a pilot hole where the legs of the stand were. I then pushed them through, so that they are tight and dont need to be insulated, but I will probably wrap some tape around them.

I used a mixture of Liquid Nails and toothpicks to hold the pieces in place.

Got the 5 sides put together, I am going to let the front be the removable part and just attach it with tape when I need to.

I lined all the joints with tape.


I ended up finding a 2 year old mini fridge on craigslist that was a 3.5 cubic foot fridge.
Which gives us the cost breakdown so far:
Which gives us the cost breakdown so far:
$25 - 2" x 4' x 8' - EPS foam board
$6 - Plywood board
$6 - Walmart Fan
$30 - Mini fridge
$5 - Metal wire frame organizer
$21 - Ebay Temp controller
$8 - Project enclosure from Radio Shack
$3 - outlet plug
So the total is currently at $104, just slightly over budget, however, I was able to get the extra money from my bi-weekly allowance.
Here is the new mini fridge pix with the door removed. It is a 3.3 cu foot Kenmore compact fridge.
Also earlier today you can probably tell, SWMBO cleaned and mopped the floor, I had to do a lot of cleanup.. to avoid confrontation.


Just a heads up, the foam that they put inside may as well be glue. The lip that was keeping the skin on (the outer metal), was tucked inside, so I had to use a screwdriver to pry it out.
WARNING: Use Eye protection. Besides the fact that I would like to keep my readers vision in tact so they can come back, one of my good friends poked their eye out doing something similar. (it may be uncomfortable but what is the price of your sight, plus in all his facebook pictures he has red-eye in the fake one). So don't try to pry out at eye level. I had also gouged my hands a few times, the metal is sharp when it tears and the screw driver punctures.

WARNING: Use eye protection, and do not operate at eye level
I used a hammer to pull the inner plastic out from being tucked into the metal skin. It made it a lot easier to separate them.
 You will have to remove the freezer compartment (if yours has one) and the temp controller, the freezer compartment just slides out, those screws are deceiving. but just look for the big hole for those to slide out.

I finally got the first side up.
BE CAREFUL when removing the siding, those copper coils are how the fridge dissipates the heat, and if those get punctured, you have a useless fridge. I used a small screw driver and my hand to trace along where the coils were attached to the skin to break the thin foil holding them there.

Now that I have the first side finished, its time for a home brew. This is my Guter Weizen IPA, its refreshing like a hefe, but the kick and aroma of an IPA

Got the top removed, it was a bit easier, there were no cooling coils in the top for me, But that is not the case for all fridges so be careful. Later I found that the wiring for the temp controller were up on top under the foam.

You will notice if you are taking apart a fridge as well that it starts to become flimsy without the metal shell. I finally got all sides taken off and the coils separated. Time to start digging out the compressor base

This is a picture of me the dug out compressor base, so that I can remove just the base, without breaking any coils. The fridge I'm working with has a thin metal frame which everything goes through and I think I'll utilize it later on... Yes also its very messy. I don't have a shop vac, and some of those foam pieces are sticky, and the black stuff is just some clay.

I was finally able to detach the coils and the compressor, here is a pic of all the important stuff. Compressor, coils, fridge tray.

I got the Temp controller finally built. Following the HomeBrewTalk thread found here: http://www.homebrewtalk.com/f51/ebay-aquarium-temp-controller-build-163849/ However, I will note a few things.
It is very hard to cut the surface of the project enclosure. What I ended up doing was drilling a 1/2 hole in the center of the measured corners, then took the hacksaw blade out of the hacksaw, and sawed the squares out.
I had also tried re-purposing a soldering iron to melt the plastic... that was a disaster.
But here is my finished temp controller. I just did a test and its pretty accurate... Wish I did this for my keezer instead of dropping $90 on a Johnson analog controller. For $34 I have a brand new temp controller that does hot & cold. What a bargain, and it shows me the current temp.

So, started out by cutting the side off of the fridge with the tin snips. Make sure you wear gloves if you use tin snips, not cheap ones either, the heavy duty ones. I got bit by a piece of the metal that came up on the corner. But like a real man, I don't bleed, I just swear a lot. But really, it was not fun to deal with, so just be careful.

I got the siding cut, and I used the back of a hammer to just run along it and scrape off all the excess foam. I suppose a metal spatula would have done the same thing, but I don't have a lot of tools.
 The next task was handling the freezer compartment, after trying to bend the freezer flat by hand, I noticed that it was arching the middle, where I wasn't holding it, which can be bad if it pinches the coolant line. So I laid the compartment down on a table, across a board of wood. Held down the center portion while I bent it flat. If you have a workbench you may want to use another piece of wood to hold it in place, I would just caution though, that if you do that you can't see if you are pinching the coolant lines.
 Here is 1 side flattened.

Here is a picture with both sides flattened.

So I built a little guard out of wood to hold the compressor up at the right hight, and I anchored it to the bottom rack. Its turned upside down so that its easier to screw in

I tried to screw it in with the aluminum guard that was on it, but the right side was too distorted from when I initially dismantled the fridge.

I decided just to remove the encasing. To do so I just used the tin snips and cut a wide wedge VERY CAREFULLY to each element, and carefully moved it out of the way. I did manage to get stabbed a few more times from the metal slivers. I think it went all the way to the bone of my thumb this time but it was narrow so luckily I don't need stitches. So learn from my experience

Cut out the metal, and got it flipped over to the right side. Did it carefully because I didn't want to bend/break anything, and they weren't protected by the aluminum guard that I just removed.

I ended up having to remove the top portion to slide it in, as I tried to get the cooling component in via the slit that was from the previous fridge, but it was to small, and I didn't want to risk bending the coil and breaking it. I'd rather pay the $2 for another bottle of liquid nails.

Got the thermostat and probe attached to the freezer compartment. Next is to secure the coils to the side, and then re-glue the top.
Note: If your layout is similar to mine, wait till the end to attach the top. It will save you some hassle.
$6 - Plywood board
$6 - Walmart Fan
$30 - Mini fridge
$5 - Metal wire frame organizer
$21 - Ebay Temp controller
$8 - Project enclosure from Radio Shack
$3 - outlet plug
So the total is currently at $104, just slightly over budget, however, I was able to get the extra money from my bi-weekly allowance.
Here is the new mini fridge pix with the door removed. It is a 3.3 cu foot Kenmore compact fridge.
Also earlier today you can probably tell, SWMBO cleaned and mopped the floor, I had to do a lot of cleanup.. to avoid confrontation.
Back of fridge
Front of fridge
WARNING: Use Eye protection. Besides the fact that I would like to keep my readers vision in tact so they can come back, one of my good friends poked their eye out doing something similar. (it may be uncomfortable but what is the price of your sight, plus in all his facebook pictures he has red-eye in the fake one). So don't try to pry out at eye level. I had also gouged my hands a few times, the metal is sharp when it tears and the screw driver punctures.
WARNING: Use eye protection, and do not operate at eye level
I used a hammer to pull the inner plastic out from being tucked into the metal skin. It made it a lot easier to separate them.
BE CAREFUL when removing the siding, those copper coils are how the fridge dissipates the heat, and if those get punctured, you have a useless fridge. I used a small screw driver and my hand to trace along where the coils were attached to the skin to break the thin foil holding them there.
Now that I have the first side finished, its time for a home brew. This is my Guter Weizen IPA, its refreshing like a hefe, but the kick and aroma of an IPA
Got the top removed, it was a bit easier, there were no cooling coils in the top for me, But that is not the case for all fridges so be careful. Later I found that the wiring for the temp controller were up on top under the foam.
You will notice if you are taking apart a fridge as well that it starts to become flimsy without the metal shell. I finally got all sides taken off and the coils separated. Time to start digging out the compressor base
This is a picture of me the dug out compressor base, so that I can remove just the base, without breaking any coils. The fridge I'm working with has a thin metal frame which everything goes through and I think I'll utilize it later on... Yes also its very messy. I don't have a shop vac, and some of those foam pieces are sticky, and the black stuff is just some clay.
I was finally able to detach the coils and the compressor, here is a pic of all the important stuff. Compressor, coils, fridge tray.
I got the Temp controller finally built. Following the HomeBrewTalk thread found here: http://www.homebrewtalk.com/f51/ebay-aquarium-temp-controller-build-163849/ However, I will note a few things.
It is very hard to cut the surface of the project enclosure. What I ended up doing was drilling a 1/2 hole in the center of the measured corners, then took the hacksaw blade out of the hacksaw, and sawed the squares out.
I had also tried re-purposing a soldering iron to melt the plastic... that was a disaster.
But here is my finished temp controller. I just did a test and its pretty accurate... Wish I did this for my keezer instead of dropping $90 on a Johnson analog controller. For $34 I have a brand new temp controller that does hot & cold. What a bargain, and it shows me the current temp.
So, started out by cutting the side off of the fridge with the tin snips. Make sure you wear gloves if you use tin snips, not cheap ones either, the heavy duty ones. I got bit by a piece of the metal that came up on the corner. But like a real man, I don't bleed, I just swear a lot. But really, it was not fun to deal with, so just be careful.
I got the siding cut, and I used the back of a hammer to just run along it and scrape off all the excess foam. I suppose a metal spatula would have done the same thing, but I don't have a lot of tools.
Here is a picture with both sides flattened.
So I built a little guard out of wood to hold the compressor up at the right hight, and I anchored it to the bottom rack. Its turned upside down so that its easier to screw in
I decided just to remove the encasing. To do so I just used the tin snips and cut a wide wedge VERY CAREFULLY to each element, and carefully moved it out of the way. I did manage to get stabbed a few more times from the metal slivers. I think it went all the way to the bone of my thumb this time but it was narrow so luckily I don't need stitches. So learn from my experience
Cut out the metal, and got it flipped over to the right side. Did it carefully because I didn't want to bend/break anything, and they weren't protected by the aluminum guard that I just removed.
I ended up having to remove the top portion to slide it in, as I tried to get the cooling component in via the slit that was from the previous fridge, but it was to small, and I didn't want to risk bending the coil and breaking it. I'd rather pay the $2 for another bottle of liquid nails.
Note: If your layout is similar to mine, wait till the end to attach the top. It will save you some hassle.

On the back, there was not enough room to bend the lines around the left side, so I ended up trying to squish them all on the back, and I ended up bending down the lines as you can see in the lower left hand corner. Just make sure to bend them smoothly. Take your time. You already spent all that time taking the fridge apart, the last thing that needs to happen is you brick your fridge, because you were in a hurry.

Here are all the coils taped in, You can see the configuration on the back, I was just trying to figure out how to fit them all, so that I didn't have to cut more metal. It ended up being only a 16 inch sheet i needed on the back and the length of the side of the fridge worked perfectly.

You can see I took the back of the fridge and used it to cover up the coils on the left side of the Fermentation Chamber.

Here is the back once i attached the sheet over the coils. Also the white tube needs to be insulated from the copper coils.

I cut out a bit of insulation for the cooling tube that goes up to the plate inside the fermentation chamber. You can see it here, I also insulated the tube from the coils a bit, using a small piece left over from my tall collar keezer build.

Finished product minus the front door. The fan is on the inside to help the air circulate and to blow air across the cooling element in the top.

I ended up using Velcro to fasten the door shut, and it ended up working pretty well.


Overall this project was a great success, giving me the ability to lager year round, without having to spend more money or get a chest freezer.
No comments:
Post a Comment