Being a home brewer, I am always looking for ways to save myself time What I have found is that I HATE rinsing, de-labeling, and sanitizing bottles. It would take me roughly 3 hours to do the 55 bottles needed for a standard 5 gallon batch. The best day so far in my brewing career has been switching to kegging. Only 1 vessel to clean, and you can drink the beer the same day you keg it, (with some shaking magic). And so I began my search for a kegerator and I ended up deciding on building a Keezer, a freezer converted to a kegerator.
The problem I was having with the standard Keezer builds was that they didn't allow for enough height over the compressor pump, and so I ended up needing a taller collar, additionally I am a taller person so not having to bend over is a great help!
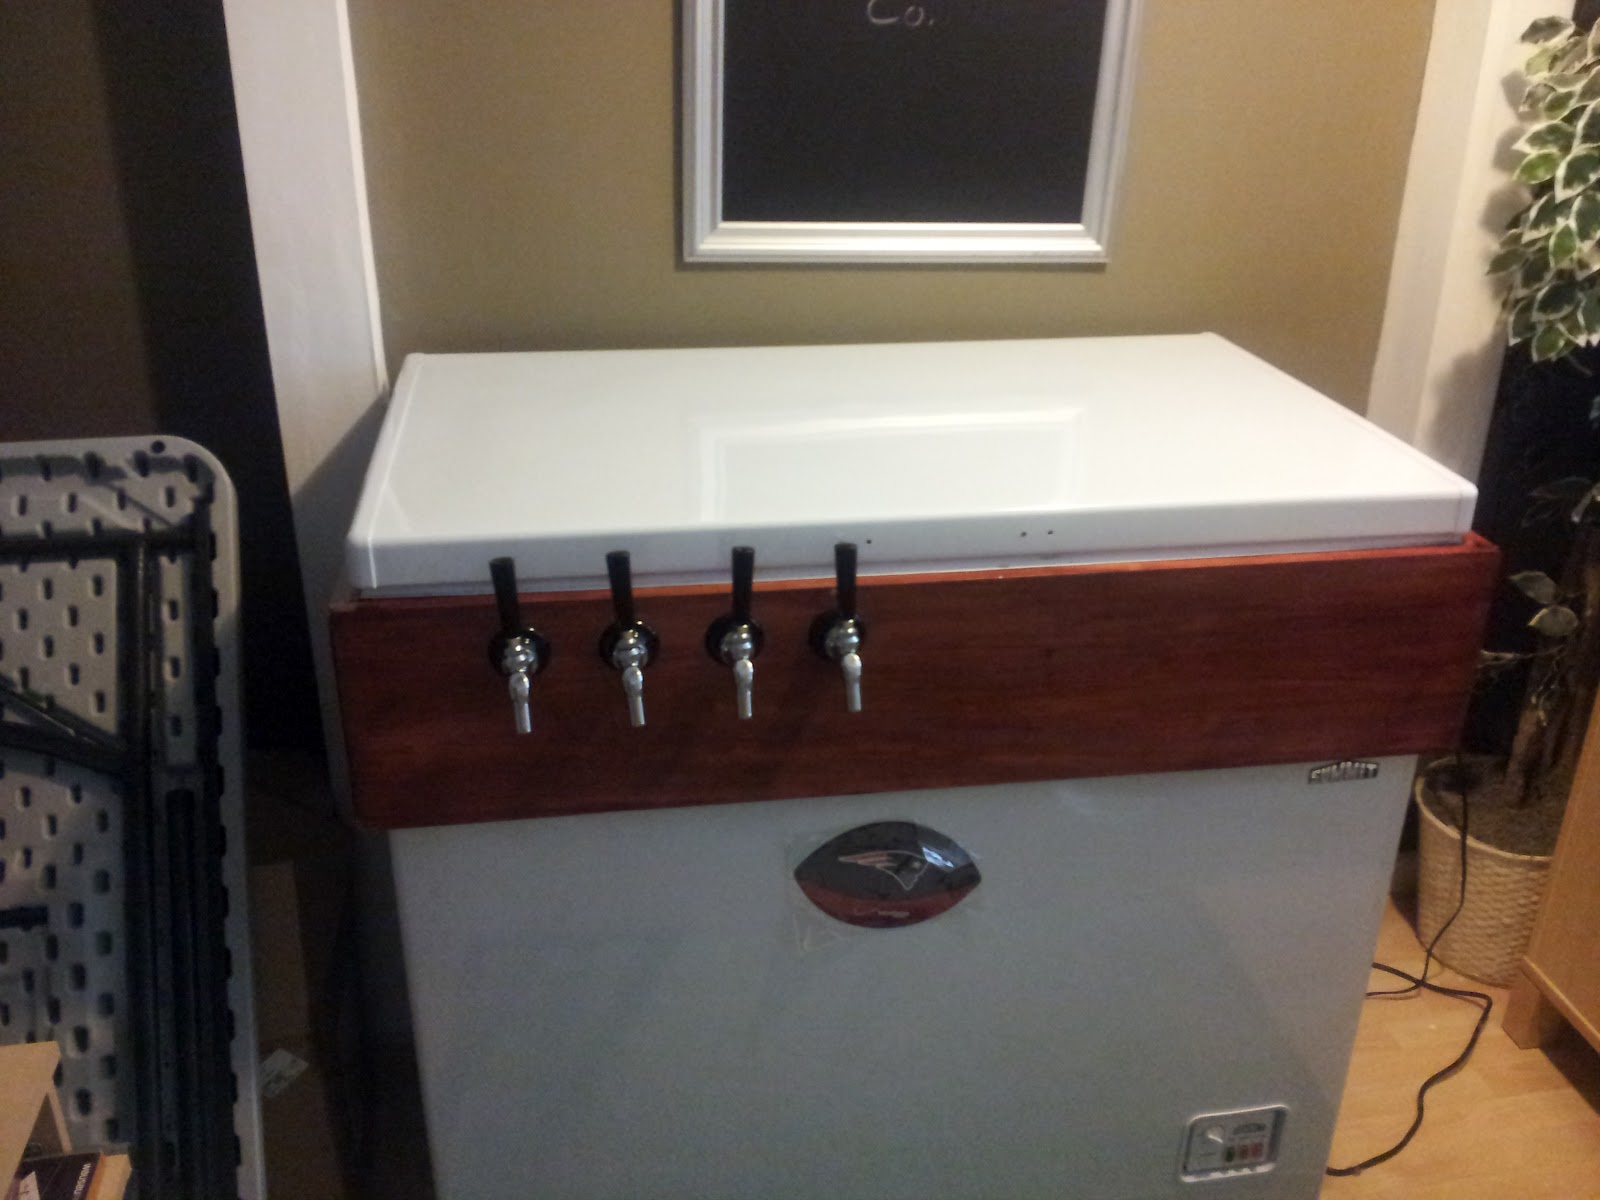
I ended up procuring a 10.6 cubic foot freezer off craigslist for $150, and decided that I wanted a 12 inch collar. And so besides the freezer, and the taps and shanks, the collar cost me about $27. $20 for the wood and $7 for the stain, I decided to go with a cherry stain. I had some wood screws lying around

I started out by joining the inner collar, which would be sitting on the lip of the freezer.

Then I put it on the freezer just to double check my measurements, and luckily it fit!


Most of my tools are limited to the basic handy man tool kit and a mitre box that I borrowed from my landlord, and the drill the lady friend let me buy, because I said that it was for hanging up her drapes. I ended up having to finish the cuts by hand which was a pain because the board was too long for the saw blade, and when I got to screwing in the boards, the measurements were off by just about 1/4-1/3 of an inch. I tried to put the gaps in the back and hope that no one would look back there. Got Wood Putty?
 |
| Since there were no outdoor lights I attached a flashlight to a snow shovel |


 |
| Sealing the gaps |
 |
| The wood is propped up and ready for staining |
 |
| Vacuuming the holes for where the tap shanks go. |
 |
| The caulk exploded, I think that there was a crack in the front of the tube and the front dried out so even though I poked a hole in the front, it was hard. |
 |
| Staining the wood, I used spare pieces of wood to prop it upso that I could stain the under side |
 |
| I lined the bottom with weather stripping to give it a nice seal |
I put the collar on the freezer and it was a snug fit, but it fit great. I added a fan to help the air circulate so that I don't get frost lines, which is where the cold air stays on the bottom and freezes the bottom of the keg. The temp probe is so that I can disable the freezer's thermometer and use it as the switch for when to cycle the freezer on and off. I am just using a Johnson Control analog sensor, however if I had to do it again, I would just build my own using an aquarium thermometer.

The Finished Product
No comments:
Post a Comment